We're going to add autodimming side mirrors to cars with an autodimming interior mirror.
VW never made my car (Scirocco MK3) with dimming side mirrors, but most other models like the Golf, Eos and Passat CC could have a drivers side mirror. The aim is to add autodimming mirrors to both sides using parts from cars which came with dimming side mirrors.
This procedure isn't too difficult, just time consuming! It's basically the same as I found for the Mk4 Golf in 2008 so it should apply across a wide range of VW generations and models
![6.gif 6.gif]()
THE IDEA:
The interior mirror is the center of it all: it also controls the dimming of the side mirrors.
With a little investigation, I realised the interior mirror provides outputs to power auto-dimming outside mirrors. These outputs simply aren't connected to anything if you don't have dimming side mirrors from the factory. We'll fix that
If you look closely at the wiring at the interior mirror you can see the following:
![mirrorconnector.jpg mirrorconnector.jpg]()
Only 4 slots of the connector (4B0 971 834) are actually wired up into roof wiring harness.
Looking at the wiring diagrams from the EOS and the Passat CC you can see that wires 5 and 6 head off to the door mirrors.
So all we have to do is run extra wires from the interior mirror to the side mirrors, 2 wires for each side. We'll connect the wires to special dimming mirror glass.
![dash3.png dash3.png]()
PARTS LIST
The part nunbers I list are for a Scirocco, but similar or identical parts would be used on other models.
Crimps for Connector at Back of Interior Mirror (x2)
Crimps: The easiest way to get these is to buy a new connector 4B0 971 833 from VW, as it comes with 6 new crimps.
Repair Wire: 000 979 018
![4B0971833.jpg 4B0971833.jpg]()
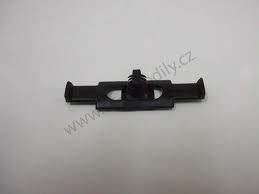
Wiring loom holders for the A-pillars 4B0 971 848 (x4)
You need these to anchor the new looms to the metal of the A-pillar, if no loom is already present in the A-pillars. On my car there was a loom on one side only.
![4B0971848.jpg 4B0971848.jpg]()
Crimps for Door Loom Connector Inside (2 per side)
![N10318905.jpg N10318905.jpg]()
Repair Wire: 000-979-134
Crimp: N 103 189 05
Crimps for Door Loom Connector Door (2 per side)
![2254656-40.jpg 2254656-40.jpg]()
Repair wire: 000 979 151E
Crimp: TE Connectivity 1241394
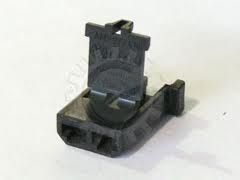
Connector for back of mirror glass (1 for each mirror)
443 906 231
![443906231-1.jpg 443906231-1.jpg]()
Crimp for the Connector at back of mirror glass (2 for each mirror)
![N0174835.jpg N0174835.jpg]()
Repair wire: 000 979 105
Crimp: N 017 483 5
Mirror Glass
VW only supplied dimming glass on the driver's side - not good enough We'll make a complete set by getting driver's mirrors from left and right hand drive cars:
For the Scirocco / EOS / Passat CC, you need the LHD mirror 3C8 857 521D and the RHD mirror 3C8 857 522D
Wire
About 6 meters for each side mirror.
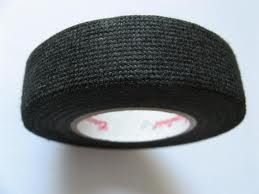
Wiring Loom Tape
A part number for VW dealers is 000 979 950, but you can get a variety of sizes. Coroplast is a good brand.
![coroplast.jpg coroplast.jpg]()
Note: Crimps or Repair Wires:
You need to decide what approach you will take to the wiring:
1: Use the yellow VW repair wires. This won't require any crimping and VW specify which repair wire is needed for each connector. However you will have to make many joins, as the repair wires are very short. You also have to buy bags of 5 or 10 repair wires, so it gets expensive.
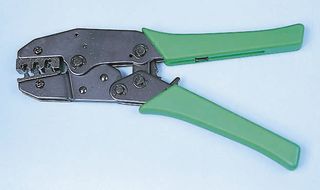
2: Use crimps. I prefer this approach so I would have continuous wires in the right colours. I used a Duratool HT-236C crimper, which comes with a die to make decent f-type crimps.
![Crimptool-1.jpg Crimptool-1.jpg]()
Installation:
1. Remove the casing around the mirror base. Open up the connector 4B0 971 833. Push crimped wires into the empty points.
2. Remove the overhead centre console. Feed the new wires from the mirror up into the roof. Split them in two to have a pair of wires running to each side mirror.
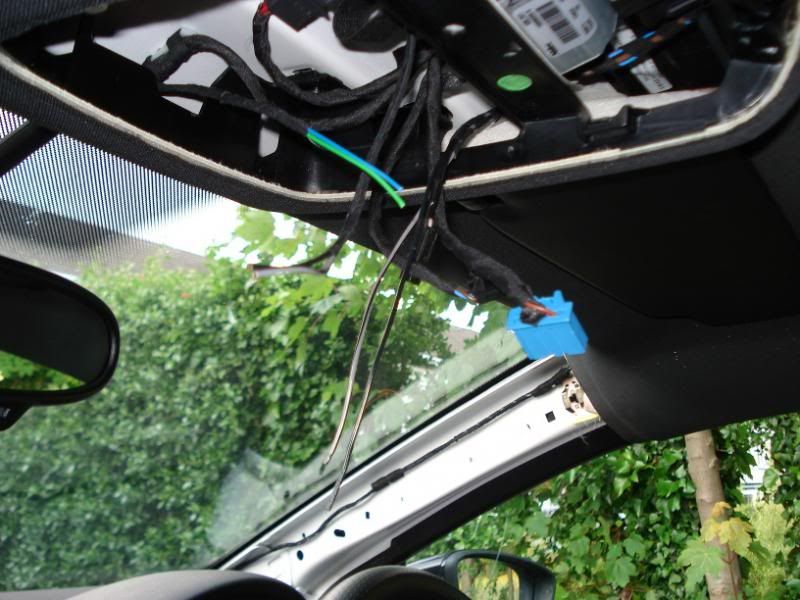
3. Remove the sunvisors, sunvisor clips, roof lights, a-pillar trim and dashboard side pieces from the roof to the floor. Run the pair of wires across above the headlining, taking care not to pinch them or obstruct the side airbag. Run the wires down the a-pillar securing them to the existing loom or to new wire holders.
![wiringroute.jpg wiringroute.jpg]()
4. Run the wires from the top of the dashboard to the door wiring connector.
5. Open the door and pull off the rubber boot that protects the loom going from the car into the door. Flip down the orange lever and pull the connector apart. Unclip the interior half of the connector and pull the loom into the footwell so you have room to work. Lever the purple catch upwards one click. Push a crimped wire into an empty slot in the connector. Push the purple catch back in to retain the crimps within the connector.
![doorconnector.jpg doorconnector.jpg]()
6. Remove the door card. Remove the door mirror. Disconnect all the wiring and the door pull mechanism. Loosen or remove the black plastic inner door panel so you can reach in to access the door wiring loom. Free the door wiring connector and pull out so of the loom so you can work on it. Unwrap the rubber boot on the existing wiring loom. Insert crimped wires into the connector in the same manner as in step 5 above.
![insideconnector.jpg insideconnector.jpg]()
7. Wrap the pair of wires with loom tape and feed them into the rubber boot and feed them with the existing loom out of the inside of the door.
8. Bolt the inner door card back up. Tape the wrapped pair of wires to the existing loom clips and bring them up to the mirror.
9. Disassemble the mirror: take off the glass, painted cover, motor and black casing. Feed the pair of new wires into the mirror alongside the existing mirror wiring loom.
10. Crimp the terminals on to a pair of wires and place into the connector for the back of the mirror glass.
11. You can rebuild your car now You should now have mirrors like this:
![6.gif 6.gif]()
VW never made my car (Scirocco MK3) with dimming side mirrors, but most other models like the Golf, Eos and Passat CC could have a drivers side mirror. The aim is to add autodimming mirrors to both sides using parts from cars which came with dimming side mirrors.
This procedure isn't too difficult, just time consuming! It's basically the same as I found for the Mk4 Golf in 2008 so it should apply across a wide range of VW generations and models

THE IDEA:
The interior mirror is the center of it all: it also controls the dimming of the side mirrors.
With a little investigation, I realised the interior mirror provides outputs to power auto-dimming outside mirrors. These outputs simply aren't connected to anything if you don't have dimming side mirrors from the factory. We'll fix that
If you look closely at the wiring at the interior mirror you can see the following:
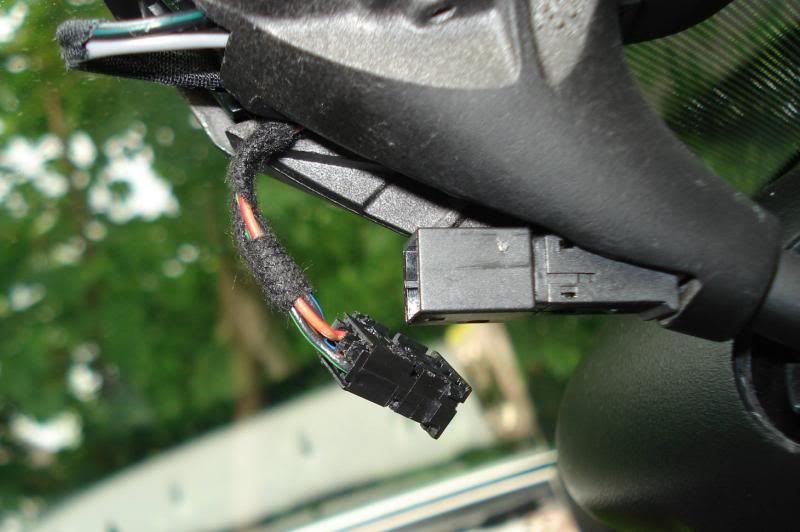
Only 4 slots of the connector (4B0 971 834) are actually wired up into roof wiring harness.
Looking at the wiring diagrams from the EOS and the Passat CC you can see that wires 5 and 6 head off to the door mirrors.
So all we have to do is run extra wires from the interior mirror to the side mirrors, 2 wires for each side. We'll connect the wires to special dimming mirror glass.
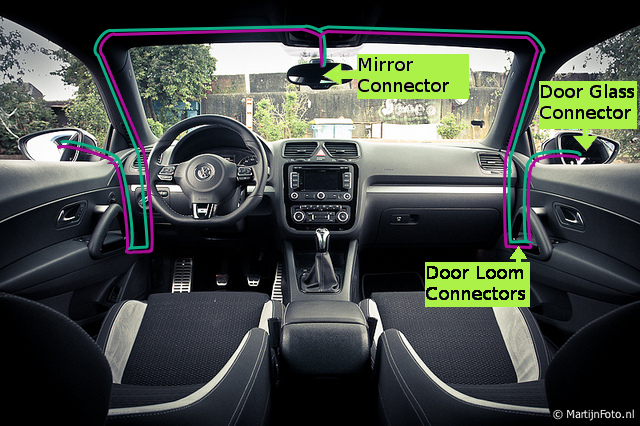
PARTS LIST
The part nunbers I list are for a Scirocco, but similar or identical parts would be used on other models.
Crimps for Connector at Back of Interior Mirror (x2)
Crimps: The easiest way to get these is to buy a new connector 4B0 971 833 from VW, as it comes with 6 new crimps.
Repair Wire: 000 979 018

Wiring loom holders for the A-pillars 4B0 971 848 (x4)
You need these to anchor the new looms to the metal of the A-pillar, if no loom is already present in the A-pillars. On my car there was a loom on one side only.
Crimps for Door Loom Connector Inside (2 per side)
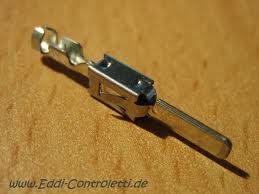
Repair Wire: 000-979-134
Crimp: N 103 189 05
Crimps for Door Loom Connector Door (2 per side)

Repair wire: 000 979 151E
Crimp: TE Connectivity 1241394
Connector for back of mirror glass (1 for each mirror)
443 906 231
Crimp for the Connector at back of mirror glass (2 for each mirror)

Repair wire: 000 979 105
Crimp: N 017 483 5
Mirror Glass
VW only supplied dimming glass on the driver's side - not good enough
For the Scirocco / EOS / Passat CC, you need the LHD mirror 3C8 857 521D and the RHD mirror 3C8 857 522D
Wire
About 6 meters for each side mirror.
Wiring Loom Tape
A part number for VW dealers is 000 979 950, but you can get a variety of sizes. Coroplast is a good brand.
Note: Crimps or Repair Wires:
You need to decide what approach you will take to the wiring:
1: Use the yellow VW repair wires. This won't require any crimping and VW specify which repair wire is needed for each connector. However you will have to make many joins, as the repair wires are very short. You also have to buy bags of 5 or 10 repair wires, so it gets expensive.
2: Use crimps. I prefer this approach so I would have continuous wires in the right colours. I used a Duratool HT-236C crimper, which comes with a die to make decent f-type crimps.
Installation:
1. Remove the casing around the mirror base. Open up the connector 4B0 971 833. Push crimped wires into the empty points.
2. Remove the overhead centre console. Feed the new wires from the mirror up into the roof. Split them in two to have a pair of wires running to each side mirror.
3. Remove the sunvisors, sunvisor clips, roof lights, a-pillar trim and dashboard side pieces from the roof to the floor. Run the pair of wires across above the headlining, taking care not to pinch them or obstruct the side airbag. Run the wires down the a-pillar securing them to the existing loom or to new wire holders.
4. Run the wires from the top of the dashboard to the door wiring connector.
5. Open the door and pull off the rubber boot that protects the loom going from the car into the door. Flip down the orange lever and pull the connector apart. Unclip the interior half of the connector and pull the loom into the footwell so you have room to work. Lever the purple catch upwards one click. Push a crimped wire into an empty slot in the connector. Push the purple catch back in to retain the crimps within the connector.
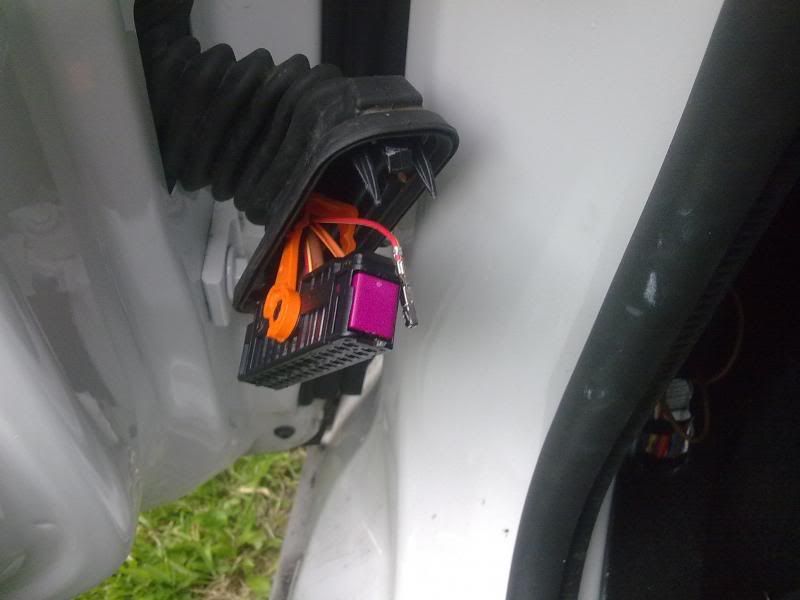
6. Remove the door card. Remove the door mirror. Disconnect all the wiring and the door pull mechanism. Loosen or remove the black plastic inner door panel so you can reach in to access the door wiring loom. Free the door wiring connector and pull out so of the loom so you can work on it. Unwrap the rubber boot on the existing wiring loom. Insert crimped wires into the connector in the same manner as in step 5 above.
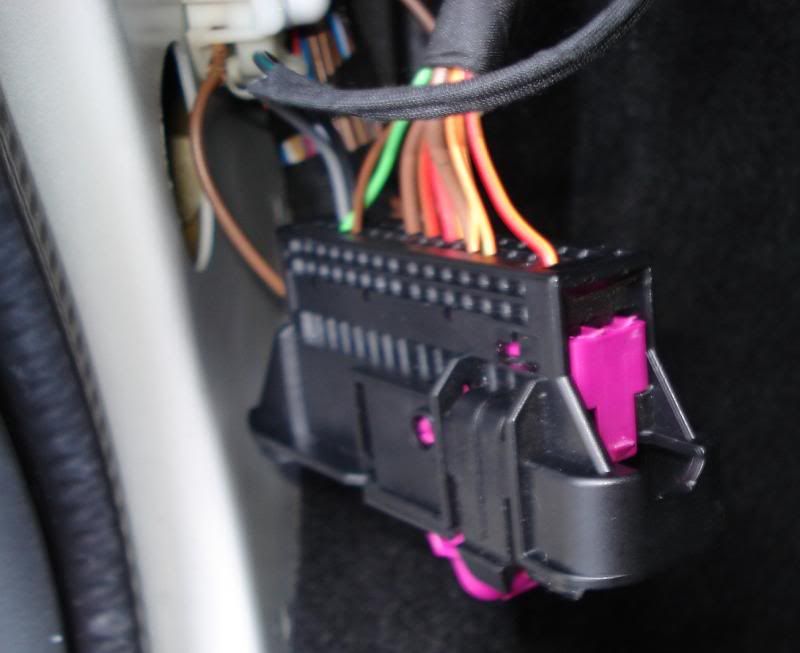
7. Wrap the pair of wires with loom tape and feed them into the rubber boot and feed them with the existing loom out of the inside of the door.
8. Bolt the inner door card back up. Tape the wrapped pair of wires to the existing loom clips and bring them up to the mirror.
9. Disassemble the mirror: take off the glass, painted cover, motor and black casing. Feed the pair of new wires into the mirror alongside the existing mirror wiring loom.
10. Crimp the terminals on to a pair of wires and place into the connector for the back of the mirror glass.
11. You can rebuild your car now


