First of all I cannot take any credit for this fix, it was pointed out by Mick B in the following thread:
http://uk-mkivs.net/forums/thread/675412.aspx
Anyway I decided to do my passenger seat today and take a few photos for reference. It took approximately an hour with no rushing whatsoever [ ]
]
Tools required:
13mm socket & driver, philips screwdriver, flathead screwdriver, axle stand or bricks for support, a lump hammer and a heavy duty chisel - something soft to lay your seat on the ground may be an idea. I used an old duvet.
First take the negative terminal off your battery, your seats have airbags inside and you don't want them going off whilst removing the seat [:|]
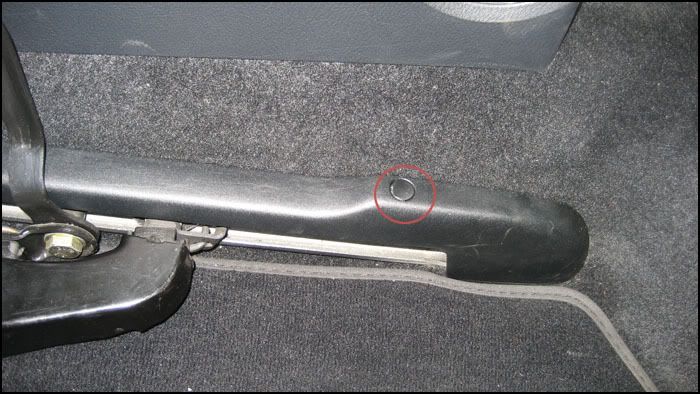
Move the seat as far forward as it will go on it's runners, you need to remove the plastic cap (circled in red) Use your flathead screwdriver to carefully pry the cap off
![Posted Image Posted Image]()
and remove the screw underneath the cap. Do this on both sides and remove the long black plastic pieces which come away easily
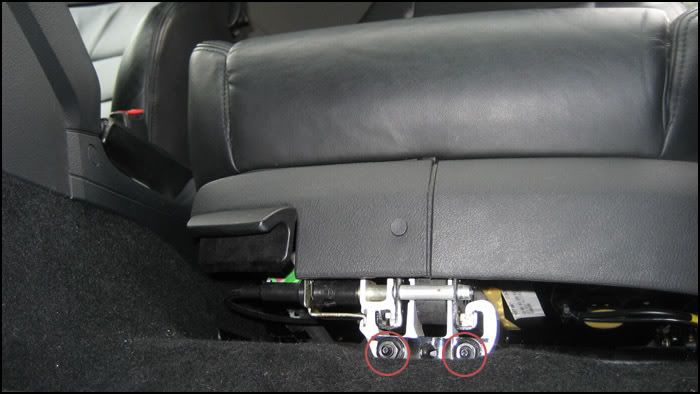
Then, move the seat as far back as it will go on it's runners. Look at the centre
![Posted Image Posted Image]()
See the 2 x 13mm bolts (circled in red) - these need to come off
Tilt the seat forwards, and slide it all the way back until it's free from the runner channels. Then you need to go under the seat and unclip the wiring connector(s) for the airbag and if like me you have heated seats [ ]
]
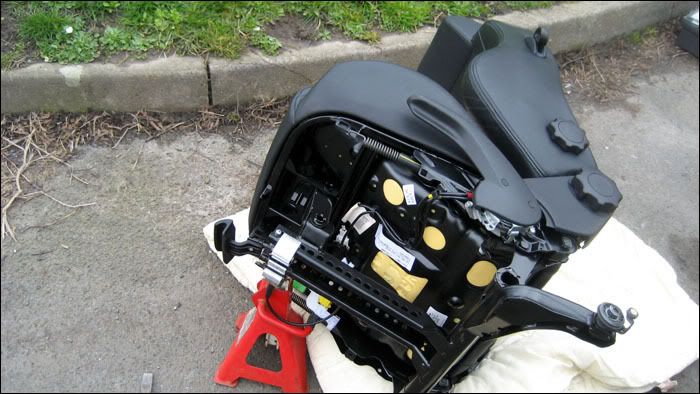
Take the seat out of the car, remove the black trim (a couple of philips screws) around the base, and lay it on it's side
![Posted Image Posted Image]()
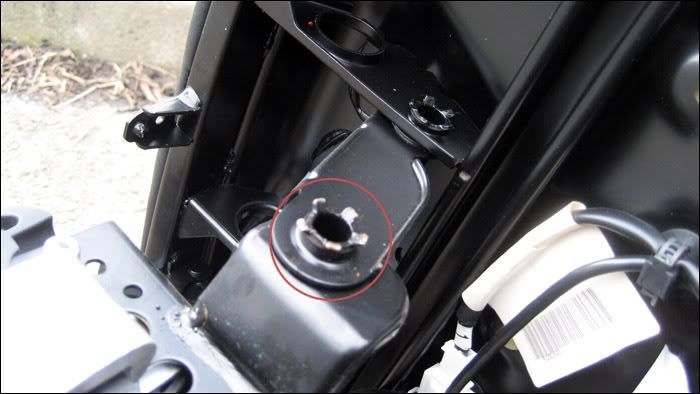
The following picture shows the pressed joints you need to be looking at. They're near the front of the seat
![Posted Image Posted Image]()
![Posted Image Posted Image]()
There's 2 per side
![Posted Image Posted Image]()
Now what I did was to use the axle stand to go under the opposite side to support the seat as I whacked the pressed 'flaps' down with the lump hammer and chisel
![Posted Image Posted Image]()
I found it easier to use the chisel upside down as this got all 5 flaps pressed down in a couple of hits. I then finished off using the chisel the right way up. The upper joints are a bit harder to access but by no means impossible. When you've done both of them, flip the seat over and repeat on the other side. Take your time and you'll be rewarded with a silent seat [ ][y]
][y]
Refit the seat, reconnect the wiring plugs for the airbag and heating element, reconnect the battery and that's it!
http://uk-mkivs.net/forums/thread/675412.aspx
Anyway I decided to do my passenger seat today and take a few photos for reference. It took approximately an hour with no rushing whatsoever [
Tools required:
13mm socket & driver, philips screwdriver, flathead screwdriver, axle stand or bricks for support, a lump hammer and a heavy duty chisel - something soft to lay your seat on the ground may be an idea. I used an old duvet.
First take the negative terminal off your battery, your seats have airbags inside and you don't want them going off whilst removing the seat [:|]
Move the seat as far forward as it will go on it's runners, you need to remove the plastic cap (circled in red) Use your flathead screwdriver to carefully pry the cap off
and remove the screw underneath the cap. Do this on both sides and remove the long black plastic pieces which come away easily
Then, move the seat as far back as it will go on it's runners. Look at the centre
See the 2 x 13mm bolts (circled in red) - these need to come off
Tilt the seat forwards, and slide it all the way back until it's free from the runner channels. Then you need to go under the seat and unclip the wiring connector(s) for the airbag and if like me you have heated seats [
Take the seat out of the car, remove the black trim (a couple of philips screws) around the base, and lay it on it's side
The following picture shows the pressed joints you need to be looking at. They're near the front of the seat
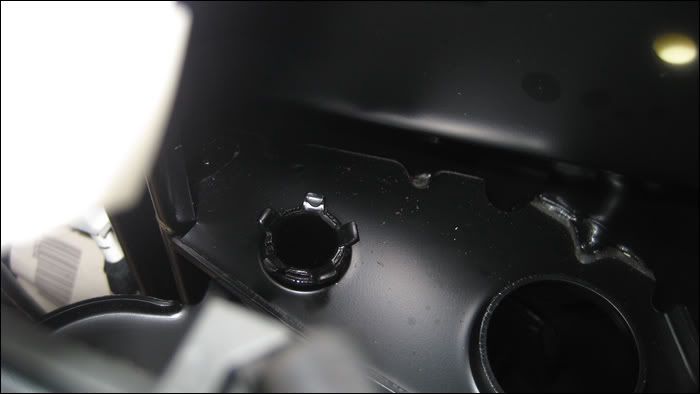
There's 2 per side
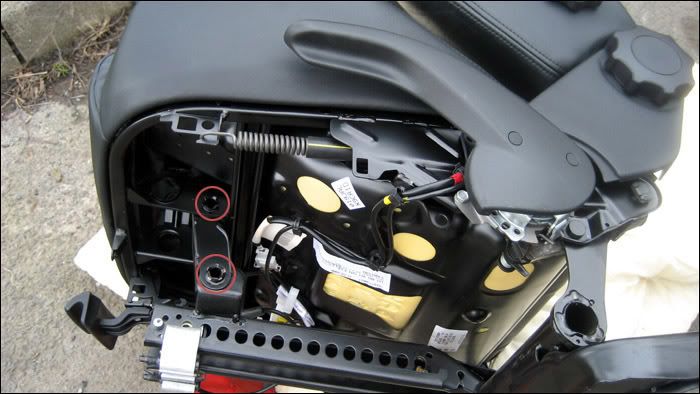
Now what I did was to use the axle stand to go under the opposite side to support the seat as I whacked the pressed 'flaps' down with the lump hammer and chisel
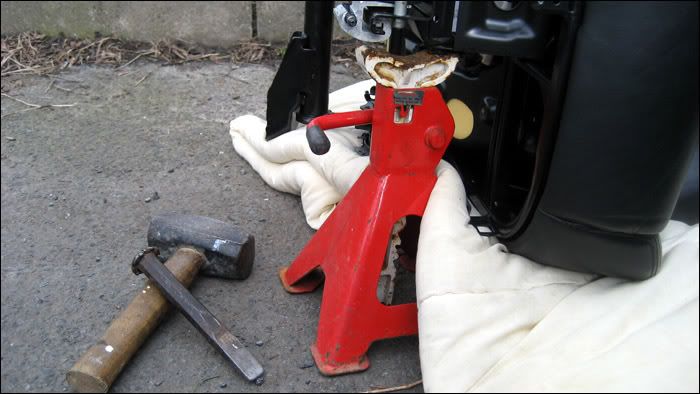
I found it easier to use the chisel upside down as this got all 5 flaps pressed down in a couple of hits. I then finished off using the chisel the right way up. The upper joints are a bit harder to access but by no means impossible. When you've done both of them, flip the seat over and repeat on the other side. Take your time and you'll be rewarded with a silent seat [
Refit the seat, reconnect the wiring plugs for the airbag and heating element, reconnect the battery and that's it!


